Configuring Modern Layouts for Form Offerings
Role: Administrator
Minimum Version: Ivanti Neurons for ITSM 2026.2.
In Self Service UI V3, form offering support modern detail views that replace the legacy form interface and provide consistent user experience. Administrators can create, design, and assign these layouts using the unified layout designer.
Prerequisites
Before configuring modern layouts, ensure the following:
•Self Service UI V3 is enabled.
•The EnableNova global constant is set to True.
 Creating a Layout
1.Log in to Neurons for ITSM as an Administrator.
2.In Configuration console, go to Build > Business Objects.
3.Select Incident.
4.Select Layouts tab and click Add New Layout below the search field.
5.In the designer, select Try Modern Designer.
The Modern Designer window opens in a new tab.
An onboarding dialog appears, you can select Skip or walk through the tour or select Do not show again checkbox to hide it in future sessions.
Ensure that Incident is selected in the Business Object list.
6.To migrate existing classic layout:
| a. | In the left pane, for Layout dropdown, select ellipses icon and then select Migrate classic layouts. |
The Migrate classic layouts window is displayed.
| b. | In the Choose BO tab, verify that incident business object is selected, then click Next. |
| c. | In the Choose layout tab, select the required layout name to migrate to modern layout and then click Next. |
You can migrate only one layout at a time, and system mode layouts can be migrated only when system mode is enabled.
| d. | In the Review & Confirm tab, verify the selected layout and click Start migration. |
A confirmation message appears after successful migration.
7.To create a new layout:
| a. | In the left pane, for Layout dropdown, select ellipses icon and then select Migrate classic layouts. |
The Migrate classic layouts window is displayed.
| b. | In the Choose BO tab, verify that incident business object is selected, then click Next. |
| c. | In the Choose layout tab, select the required layout name to migrate to modern layout and then click Next. |
You can migrate only one layout at a time and system mode layouts are not supported for migration.
| d. | In the Review & Confirm tab, verify the selected layout and click Start migration. |
A confirmation message appears after successful migration.
8.To create a new layout:
| a. | In the main window, click Add New. |
The Create Layout window is displayed.
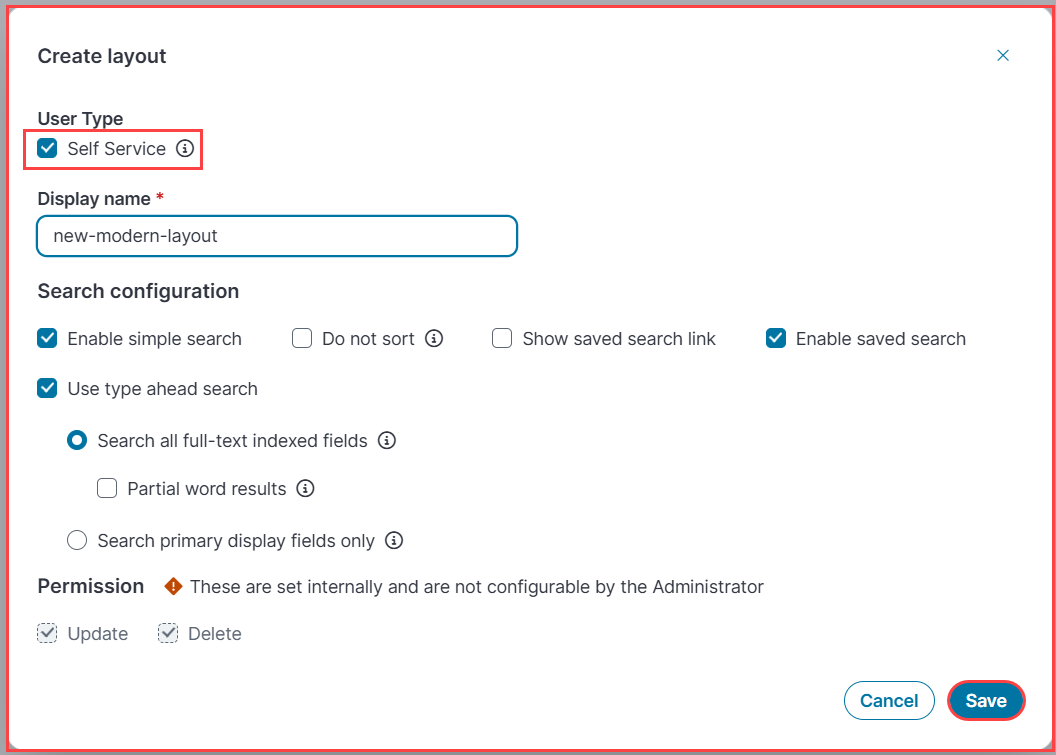
| b. | Select Self Service checkbox to enable the layout for Self Service role. |
| c. | Enter a name. In the Search Configuration section, select the required options. Hover over the information icon to view a description of each option. |
| d. | Select Save. |
A confirmation message appears.
When you enable Self Service for a modern page layout, toolbar buttons appears at the bottom of the Design section.
Creating a View
Before creating a form view, create a grid or list view and associate it with the form view. For more details, see Configuring Grid Views.
1.In the main window, select Add New View.
Alternatively, in the left pane, select the Views dropdown, select the ellipsis icon, and then select Add New.
The Create new view window is displayed.
2.In the Create new view window:
•From the View type dropdown select Form View.
•Enter a name and click Save.
The Properties tab is enabled.
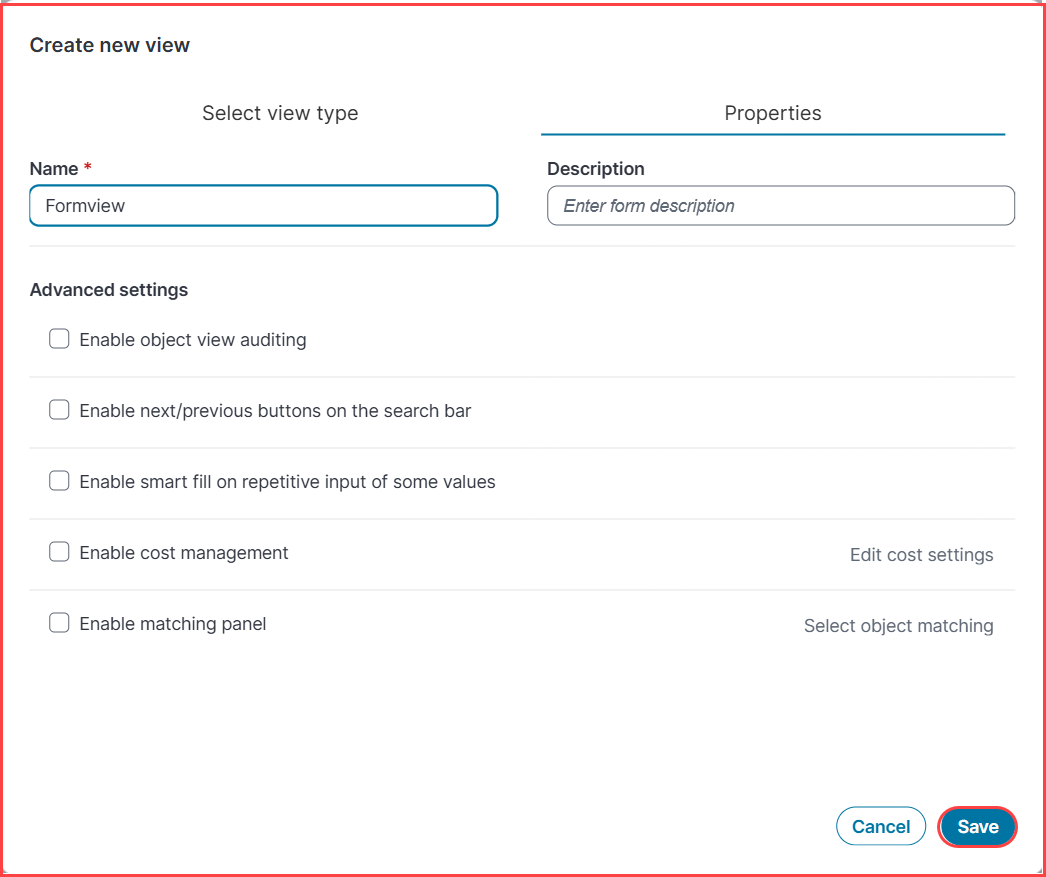
•On the Properties tab, enter a name, configure the advanced settings, and click Save.
A confirmation message appears.
Designing a View
A form view defines how the form offeringappears in Self Service UI V3. It consists of sections, content blocks, and controls.
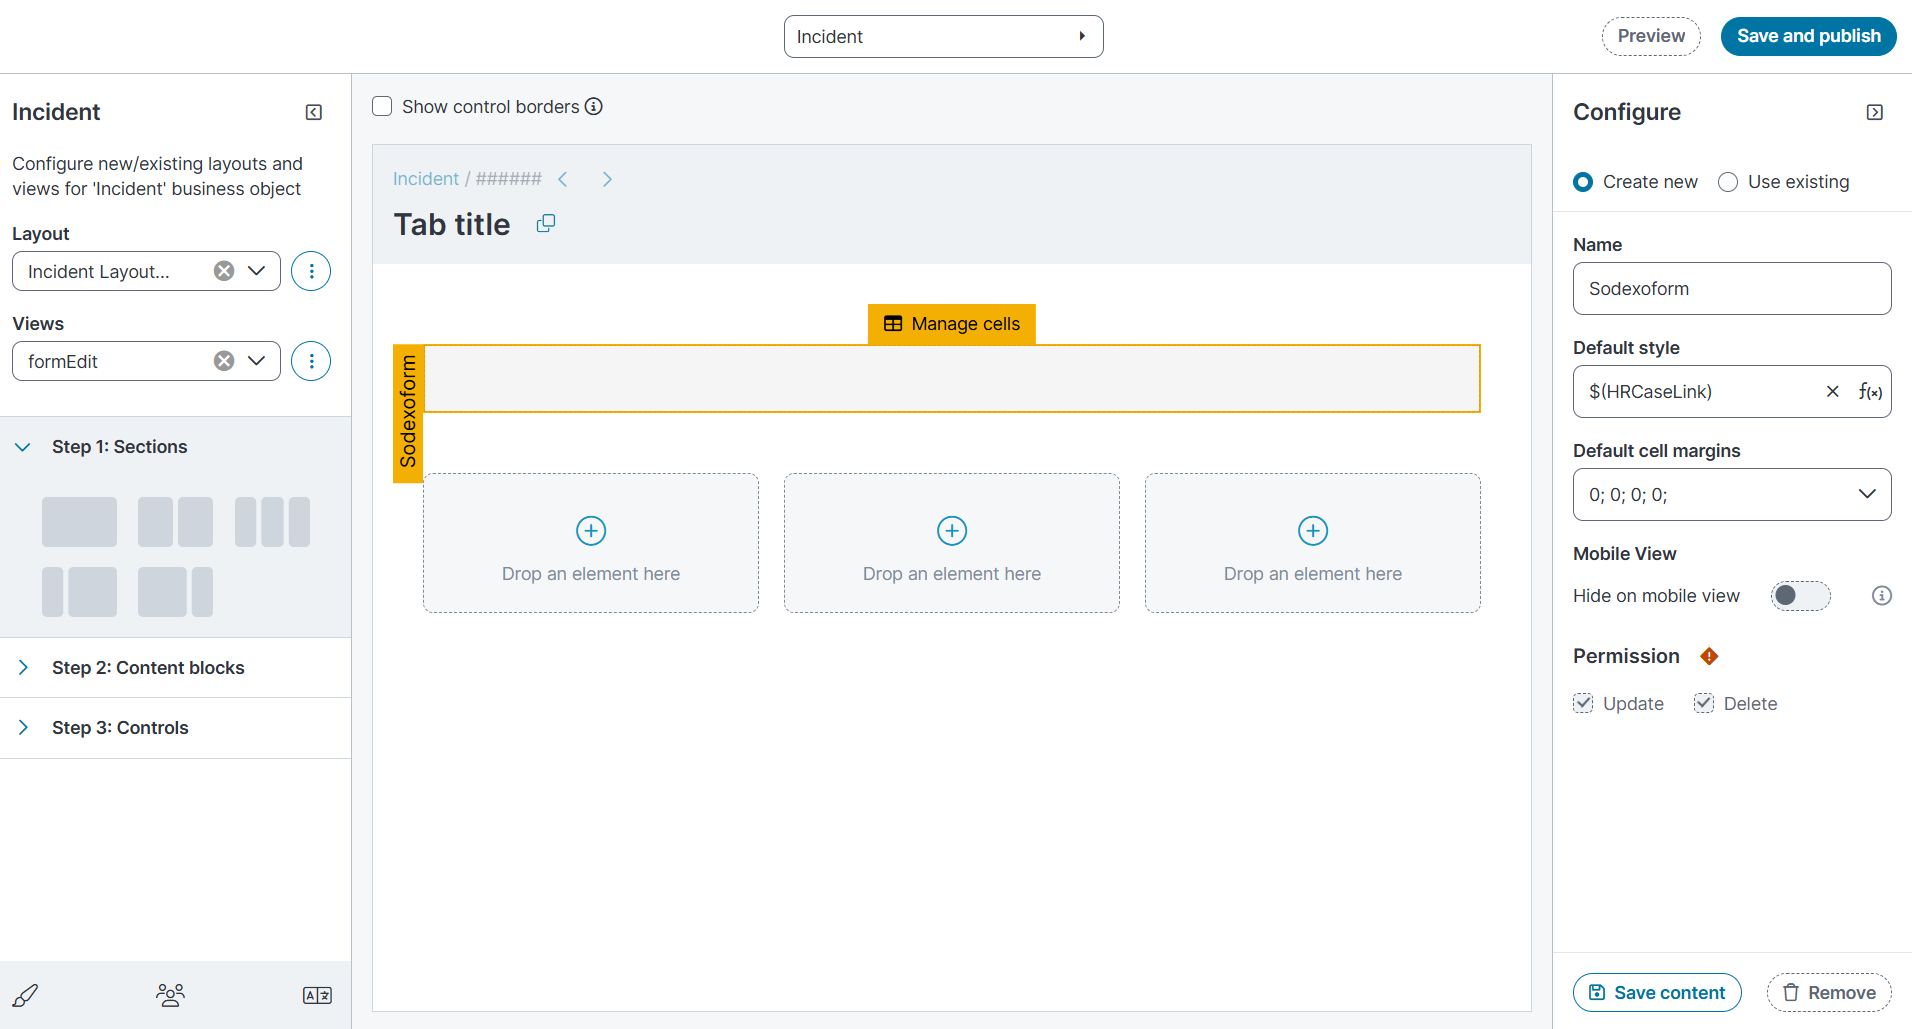
1.In Step 1: Sections, choose a layout type with (single column or multiple columns) and drag it onto the design canvas.
2.In the Configure Pane:
•Select Create new and enter name for the view or choose Use existing to base the view on a template.
•Use expression editor (fx) in the Default Style text box to define conditions, calculations, and display logic.
•In default cell margins, select dropdown and adjust cell margins to control alignment.
Text fields are left aligned and action buttons are center aligned by default. To customize the alignment of the fields according to your preferences, you can adjust the alignment using cell margins.
3.Turn on Hide on mobile view to hide the view on mobile devices.
4.Click Save content to save changes or select Remove to discard them.
5. In Step 2: Content blocks, select the required blocks. By default, the content block is associated with the selected view, and the remaining options are grayed out. The available options are:
•Form – Displays business object fields and controls.
6.In Step 3:Controls, section displays the available controls that you can add to the form.
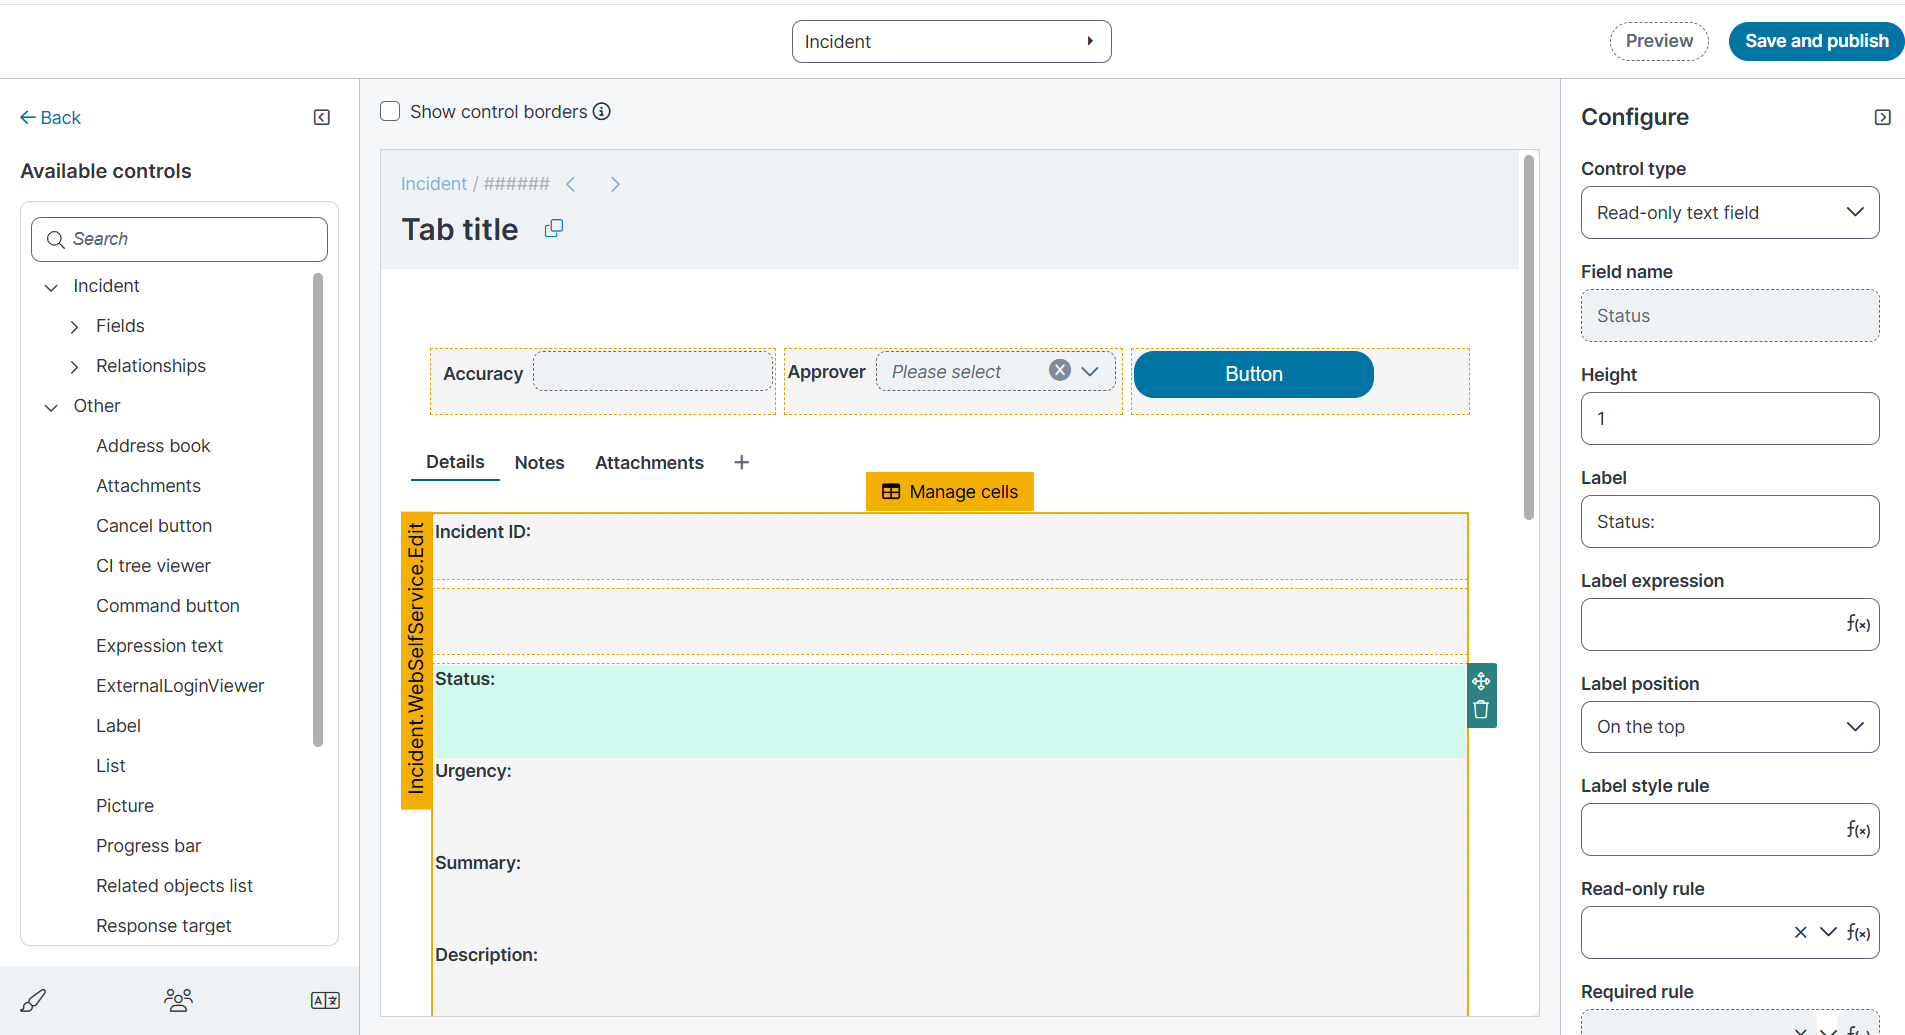
7.Drag and drop the required controls to the design canvas and select the controls to view the configuration options in Configure pane, make required modifications. The options in Configure pane are dynamic, they change based on the control options selected for the form.
•When you define supported file types in the attachment action by using a label expression in the existing Attachment control option, the text appears in a single line. To prevent text overflow, it is recommended to drag and drop an label control from available control onto the form, apply the label expression, and then enable Word Wrap. This ensures it displays correctly on the Self Service portal.
8.You can select the control, drag and move to the required location or remove the control.
9.To save and apply all customized options, select Save and Publish.
Configuring modern layout for Self service
You can enable modern layout for the existing form offering or new form offering. For more information, see Creating a Form Offering.
Only Self Service enabled modern layouts can be set in a form offering.
1.Log in to Neurons for ITSM as an Administrator.
2.Open the Request Offering workspace.
3.Select the existing form offering to configure the modern layout for the incident or click New > Form offering to configure for the new form offering.
The Form offering page is displayed.
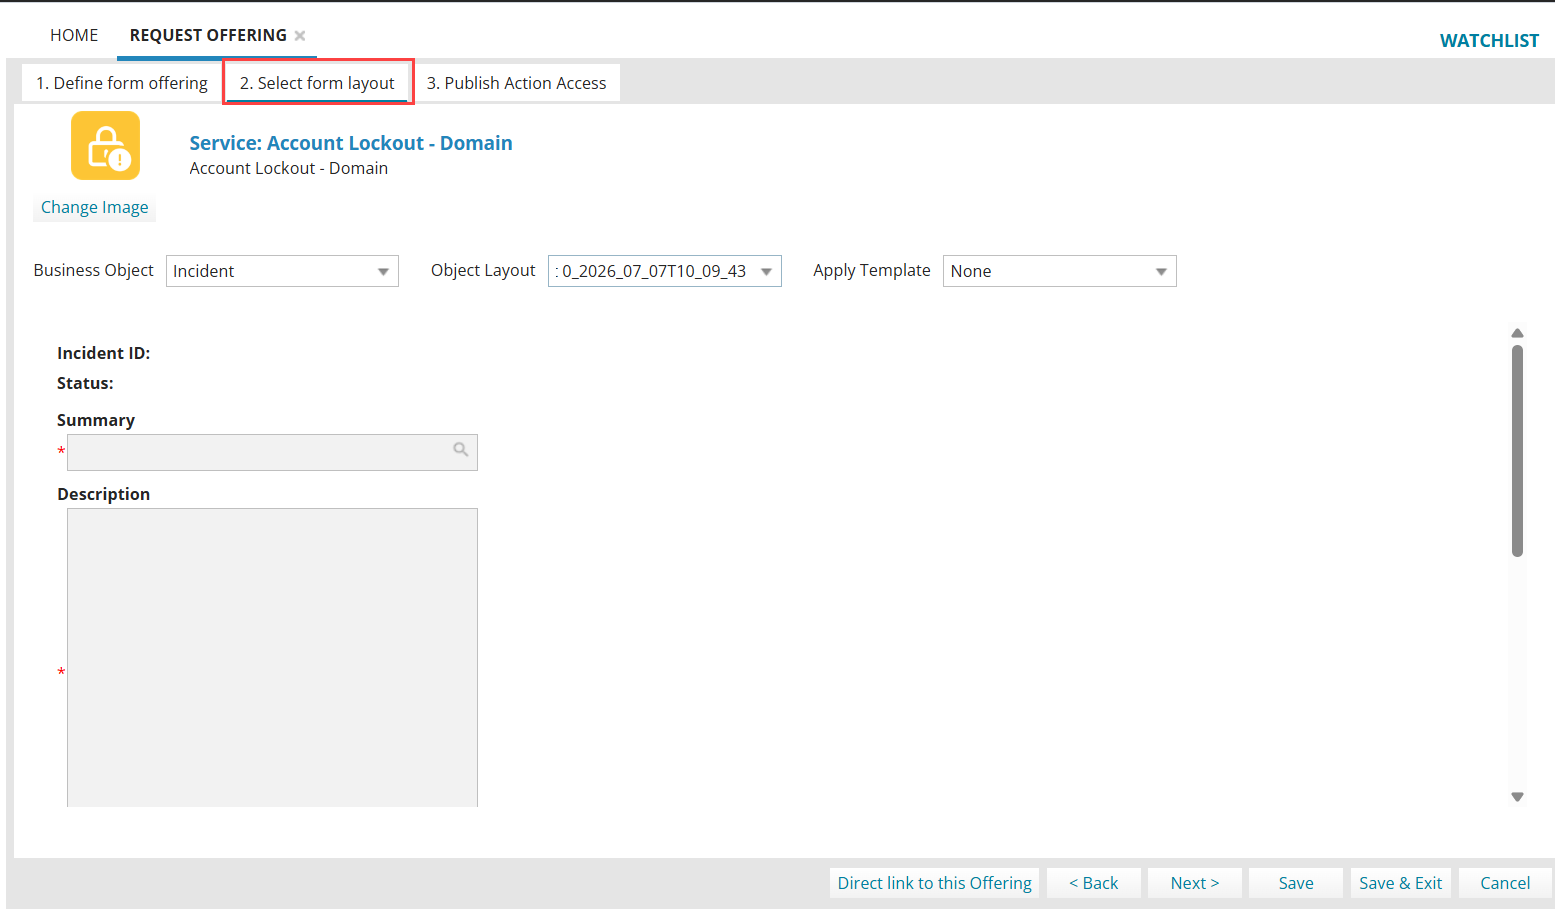
4.Click Select form layout tab. In the Object layout dropdown, select the created modern layout and then click Save.
5.Configure other options as per requirements, for more information about publish action, see Creating a Form Offering.
The system applies the selected object layout to Self Service UI V3.